Articles
Monday, June 6, 2011
x0xb0x first try
Tuesday, May 3, 2011
Fix Twitter Client Spaces Issue (OS X)
Some people fixing it manually but I wanted an automatic complete solution, so I wrote this complete Applescript solution.
What does the script do:
The script simply will check if the "Twitter" application is running. If so, it will only "focus" on it. If the application is not running, the script will lunch it and put it to the spaceNum value. You should set it to the space you want it to be by changing line 6: "set spaceNum to 1" for space 1 for example. Currently default is 3, just because I use it on space number 3 :)
How to "install":
1. Download the script: link
2. Open the zip file and place the Twitter.Fix file on your desktop.
3. Open AppleScript Editor (using spotlight or with Finder, Go to: /Applications/Utilities)
4. Edit the spaceNum (line 6) to the space you want.
5. Compile and Test if it work
6. To lunch the script I use Apptivate (which is awesome tool!), I used to use Spark (freeware) for a long time. You can use QuickSilver, Alfred, Google Quick Search box or some other lunchers out there to run the script with a Shortcut.
See it in action:
Thats it :)
Elad Gariany
Follow me @geshem_audio, @elad_g (hebrew only)
Saturday, April 10, 2010
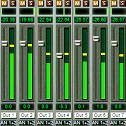
RME icons for OS X
Saturday, July 11, 2009
Yamaha SY-35 disassemble
Tuesday, April 28, 2009
TC Electronic Konnect 8 review

- 2 Inputs - XLR / 1/4” Phone Jack (TRS) - "Hi-Z guitar optimized", Phantom power.
- 2 Outputs - 1/4” Phone Jack
- 2 Phones Front output - 1/4” Phone Jack Stereo
- ADAT and S/PDIF for connecting standard digital equipment.
- Midi In / Midi Out.

- Output Level - Analog volume control knob on the front panel.
- Source Level - Digital volume control - will control the digital mixer (standalone mode).
- TC Control Panel - Very basic yet simple mixer and control panel for the interface.
- Support up to 24bit / 192Khz.
- Can operate completely as standalone.
- Direct Monitoring with low latency.
- Portable and light (useful for laptops).
- Receive power from a Power supply or Firewire.
- During the time I used the interface I heard a lot of "signal spikes" from the Monitors. The noisy-buffer like spikes might related to an electricity problem which I have in the studio or a faulty unit.
- Under Microsoft Windows XP SP2: Installing the driver is completely a mess. It's also very very important that you will test the interface with the desired computer - Laptops with Mini-Firewire port are NOT RECOMMENDED and most of the time are NOT SUPPORTED AT ALL.
- Under Apple OS X 10.5.x: Installing the driver is very very simple but when trying to upgrade though TC Website the installer crashed (on both my MacBook and MacPro). Other then that, works great.
for:
| against:
|
Sunday, April 19, 2009
New studio MIDI arrangement.
1. Synthesis for all - The digital oscillator
Sine, Triangle, Sawtooth, and Square:
The Sine Waveform:


The sine waveform also called a "Pure harmony" or "The Fundamental Harmony". As we can see in the picture, the sine waveform has only 1 harmonic, which is the fundamental harmony for that particular note that I’ve played (A2 = 110hz).

Unlike the Sine waveform, the Square waveform assembled out of odd harmonies only. The only true fact you should know for now about the Square waveform is that it is very very rich of harmonies. It's very important to understand the uniqueness of the Square waveform and deal with it the right way.
Just as guitar with a distortion effect (which commonly is an odd harmonies amplifier) played within a mix, it can be sound full-body fat “ass-kicking” sound when using it correctly.
…A sawtooth wave's sound is harsh and clear and its spectrum contains both even and odd harmonics of the fundamental frequency. Because it contains all the integer harmonics it is one of the best waveforms to use for synthesizing musical sounds…
And if you really insist to keep it simple then: “It just sounds great with filters!”. Later on, we will also learn about that.
Well, there is a lot to come over this subject but for now, it will be enough.
I hope you enjoyed it. Elad.
Saturday, April 18, 2009
Synthesis for all - intro
Well, for a while I'm looking to spread my knowledge around synthesis to the public. Acutely I wrote the first article 4 years ago but never took it too serious. I guess now it's a good time to start spreading and summering this incurable field of production which, in my opinion, every modern produces should understand.
So, I'm proud to introduce the "Synthesis for all" series of articles which will teach you all around Synths and there components. The articles will be simple to understand for everyone and will include a lot of video / audio examples of each step in the process.
Articles:
1. Synthesis for all - The digital oscillator
2. Synthesis for all - Deeper look into the oscillator
3. Synthesis for all - Additive synthesis
4. Tutorial: Simple Additive Synthesis Sounds
5. Synthesis for all - Subtractive synthesis or just filters
6. Many more to come... hopefully :)
Please, let me know your thought about it via comments.
Thanks, Elad!
Tuesday, December 2, 2008
My Tracks
Elad.
This is the first track of a rock project that I'm intend to assemble one day. If you liked it, please contact me!!!
p.s.
Sorry for the poor sound quality and poor guitar recordings. It's still just a demo ; )
Monday, October 27, 2008
In this tutorial we will dive into Logic's Environment and will see some of the possibilities of it components. For now, we will explain a simple task as transforming a Midi Notes commands to control buttons or faders. Sounds simple right?
You probably thought about Automation, LFO and all sort of other control/modulation tools.
Unlike automation, Midi Notes commands are been use here like a trigger for the signal - Just like On/Off switches. This is the main reason you might want to do this kind of thing. But you may also ask yourself, why should I EVER do such a thing?
well, jump in and you might be surprised.
Step 1 - Choose your tools and signals
I use Logic Pro 8 but as it seems, it can be perform on any version of Logic (even Logic 5.5 for PC!). So, lets open 2 tracks of Audio Instruments. The program I've used for this example is located under:
EXS24 > 05 Synthesizers > 05 Motion Sequences > Forma Sweep Trancy
Your Environment Window should look like this:
Step 2 - Create Midi Information
Create a new region of the ESX24 Channel by the particle tool and write down some chords. The chords I've choose can be see on the source files, trust me they are pretty simple and you will not want to use them anyway.Great, now that we have our sound signal and Midi sequence lets focus on Midi-Gating it.
Setting up Midi Gate notes:
Create another region of 1 bar for the second Audio Instrument channel, loop that channel using the "L" on your keyboard (of course if you didn't change the default key commands).
This, as well, will help us later. Now enter the Piano Roll and write down 16 Notes just like the following picture:
Step 3 - Setting Up the Environment tools
Go to the Environment window by clicking "cmd + 8" or Window > Environment. Create 2 Environment Objects (use the following Picture as guides).Drag and Place the new objects close to the EXS24 channel and the Audio Instrument 2 channel. The Button object will help us turning on and off as needed the volume of the Bus1. The Transformer will help us set a condition and transform the Midi notes information of Audio Instrument 2 to control the Button (which controls Bus1 volume).
Don't lose me here, I know it might sounds like programming and not music producing, but it's not that complex as it seems.
Search for the White Arrow on top of the Audio Instrument 2. Click-it and connect it to the Transformer. Click on the White Arrow of the transformer and connect it to the Button. Our last cabling will be connecting the button to Bus1 channel.
Your Environment cabling should be ready.In logic 8, cable's colors are by default so you should get the exact following result.
- Notice 3 Cables:
- Green from Inst 2 to (Transformer).
- Light Gray from (Transformer) to (Fader)
- Dark Gray from (Fader) to Bus1/Aux1.
If you've configure it right, Congratulations! We are almost done.
Step 4 - Configuring the Environment paramets
Configuring the Button object:
Click on the Button and take a look at the right panel of the Environment window. The Setting should look like this:
Configuring the Transformer:
The Transformer we see describes a CONDITION (Input) and an OPERATION (Output) that it will transform according to it's MODE.
I our case, The condition is every Midi Notes data should be transform. The operation will Change any Midi Notes information to a Midi Control data. As you see after the information will be transform, the Transformer will "fix" any Midi note pitch into Control number 7 (which will control the button). Finally, Note velocity are represented as Control value, so generally you can change the volume of the mixed channel (Bus1) by velocity. I choose not to do it so I choose to transform any Velocity to the value 90 (which equals to 0db).
If you've set it correctly, you should now something like the following audio:
Step 5 - Complexing Things Up
So we finally done with configuring it and now it's time to play around.now we'll complex the Gating with different notes length and different rhythmic divisions.
If you will do that, the velocity of the midi note will control the Volume fader of Bus1. I decided not to do that, so it as "Fix".
Step 6 - Adding Effects
Now, that our Midi-Gated-line is done, we can add effects to it.You should assing all of your effects to Bus2, which is the channel that your finall result lay on.
I added Spreader, Phaser and AVerb effects with the following parameters:
I hope you enjoyed reading, ELAD :)